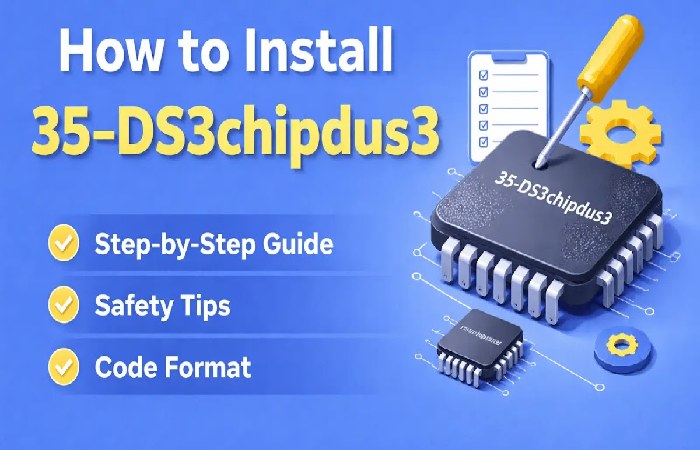
Installing 35-ds3chipdus3 correctly is less about blindly running a setup file and more about confirming what it is, using the right source, and following a clean installation process that prevents errors, conflicts, and failed device detection.
If you searched “how to install 35-ds3chipdus3”, there’s a good chance you’re already stuck in one of three frustrating situations:
- you found the file but don’t know if it’s safe
- you tried installing it and it didn’t work
- your device/software is asking for it and giving you no useful explanation
That’s the real problem with unclear installers and model-specific packages: the install itself is usually not the hard part — identifying the right package and avoiding the wrong one is.
Here’s the direct answer: to install 35-ds3chipdus3 safely, first verify what it is and where it came from, then match it to your operating system, run a clean installation, restart, and confirm the device or software is recognized properly. If auto-install fails, a manual driver or package installation usually solves it.
Key Takeaways
- Do not install 35-ds3chipdus3 until you confirm what it is and where it came from.
- The safest install method is identify → verify source → back up → clean install → restart → validate.
- Most installation failures happen because of:
- wrong OS version
- missing permissions
- corrupted installer
- conflicting older files
- A clean reinstall usually works better than repeatedly rerunning the same setup file.
- If your system doesn’t recognize it after install, the issue is often driver binding, firmware mismatch, or blocked security settings.
- If the source looks suspicious, stop immediately and verify before proceeding.
What Is 35-DS3ChipDUS3?
Before installing anything, you need to answer one simple question:
What exactly is 35-ds3chipdus3?
In practical terms, strings like this usually refer to one of the following:
- a driver package
- a chipset-related install file
- a hardware support module
- a firmware or device utility
- a vendor-specific internal package name
That matters because the installation method changes depending on what it actually is.
For example:
| Type | What it usually does | How it’s installed |
|---|---|---|
| Driver package | Helps Windows detect/use hardware | EXE/MSI or Device Manager |
| Firmware tool | Updates low-level device behavior | Vendor utility / flashing tool |
| Chipset package | Enables motherboard/device communication | Setup installer + restart |
| Support utility | Adds control panel or settings access | Standard software install |
Why most users get this wrong
A lot of people install these files just because:
- a support page told them to
- a forum mentioned it
- a device was not working
- Windows showed an unknown hardware prompt
That’s risky. If you install the wrong package, you can cause conflicts, failed detection, or even instability.
So the best installation guide starts before the installer.
Before You Install 35-DS3ChipDUS3
This is the part most low-quality guides skip — and it’s the part that saves the most time.
Check what your system actually needs
Before doing anything, confirm:
- Your operating system
- Windows 10
- Windows 11
- older Windows version
- System architecture
- 64-bit in most cases
- 32-bit only if you’re on older hardware/software
- Device or hardware model
- exact model name
- revision number if applicable
- Admin access
- many driver/chipset installers fail silently without admin permissions
Quick compatibility checklist
Use this before you install:
- I know what hardware/software this package belongs to
- I downloaded the file from a trustworthy source
- I know my OS version
- I know whether my system is 64-bit
- I can restore my system if the install fails
If you cannot tick at least 4 out of 5, don’t install yet.
Verify the source
This is non-negotiable.
If 35-ds3chipdus3 came from:
- a random file-sharing site
- a spammy “driver download” portal
- a forum attachment
- an unofficial ZIP archive with no vendor info
…you should treat it as untrusted until proven otherwise.
Safe source hierarchy
Use this order:
- Official manufacturer support page
- Official device/software documentation
- Authorized support knowledge base
- Trusted enterprise deployment package (if from IT/admin source)
Red flags that should stop you immediately
Do not proceed if you notice:
- file name looks auto-generated and unrelated
- installer asks for strange permissions unrelated to hardware/software setup
- the site pushes “driver updater” tools instead of the actual package
- multiple popups, fake scan buttons, or aggressive ads
- file hash/signature info is missing when it should be present
If possible, check:
- digital signature
- publisher name
- file size
- version number
- release notes
For practical trust checks, it also helps to compare the package against support guidance from Microsoft Support, the relevant device manufacturer, and if it’s chipset-related, often vendors like Intel, AMD, or board-level OEM support documentation.
Create a rollback point
This is one of those boring steps that becomes very exciting when something breaks.
Before installation, do at least one of the following:
- create a Windows restore point
- create a system image backup
- export the current driver if replacing an existing one
- note the current version number
This matters especially if:
- your hardware is already partially working
- you are replacing an older driver
- the package affects chipset, USB, display, network, or storage behavior
Rule of thumb: if the install touches something your PC needs to boot, connect, or display correctly, make a rollback option first.
How to Install 35-DS3ChipDUS3 (Step-by-Step)
Now for the actual install process.
This method works best when 35-ds3chipdus3 is a driver or device-related support package.
Step 1 – Download the correct package
When downloading the file, make sure it matches:
- your exact hardware/software model
- your OS version
- your system type
- your revision/build, if listed
Do this:
- choose the stable release unless a vendor specifically says otherwise
- avoid “beta” or “experimental” versions unless you are fixing a known issue
- keep the downloaded file in an easy-to-find folder like:
- Downloads
- Desktop
- a dedicated Drivers folder
Don’t do this:
- don’t download 3–4 similar packages and guess
- don’t install a package “just because it’s newer”
- don’t use a package meant for a different revision or region unless the vendor confirms compatibility
Step 2 – Extract or prepare the files if needed
Not every installer runs as a simple one-click setup.
The file may come as:
- .EXE
- .MSI
- .ZIP
- .RAR
- .INF-based driver folder
If it’s compressed:
- extract it first
- keep the folder structure intact
- do not rename random files inside unless the vendor instructs you to
A common beginner mistake is trying to run:
- only one internal file
- the wrong setup helper
- a partial extracted file set
If the package includes:
setup.exeinstall.exeautorun.exe
…that is usually your starting point.
If it includes only:
.inf,.sys,.cat
…that usually means it may need manual installation through Device Manager.
Step 3 – Run the installer properly
Once the file is ready:
- Right-click the installer
- Click Run as administrator
- Follow the install prompts
- Accept the installation path unless you have a reason to change it
- Let it complete fully
- Restart your system if prompted
Important:
A lot of installations look “done” before they are actually complete.
Do not:
- unplug the device mid-install
- close the setup early
- skip the restart if it’s requested
Best install order (if this is part of a bigger hardware setup)
If you’re installing multiple related packages, the usual safest order is:
- Chipset / base driver
- Device-specific driver
- Control utility / support software
- Firmware update (only if required)
That order prevents a lot of “device not recognized” problems.
Step 4 – Manual install if auto setup fails
If the installer doesn’t work, don’t keep double-clicking it 12 times. That’s how people create conflicts.
Instead, do a manual install.
Manual install method on Windows
- Press Windows + X
- Open Device Manager
- Find the device:
- under Unknown devices
- or the relevant hardware category
- Right-click it
- Choose Update driver
- Select Browse my computer for drivers
- Point it to the extracted 35-ds3chipdus3 folder
- Make sure Include subfolders is checked
- Click Next
If the package is valid, Windows may bind the correct driver automatically.
If there is an INF file
You can also:
- right-click the
.INFfile - choose Install
This is especially useful when:
- the setup executable is broken
- the package is old but still valid
- the installer wrapper fails while the actual driver files are fine
Step 5 – Confirm it installed correctly
This is where most people stop too early.
A completed installer does not always mean a successful installation.
Check these signs:
- the device/software now appears correctly
- no yellow warning icon in Device Manager
- version number updated
- the device actually functions as expected
- no repeated hardware error popups
Example validation scenario
Let’s say 35-ds3chipdus3 is for a device that wasn’t showing up earlier.
A successful install should result in:
- device visible under the correct category
- no “Unknown Device” listing
- no error code like:
- Code 10
- Code 28
- Code 43
If the installer finished but the device still fails, the issue is probably not installation alone — it’s likely a compatibility, hardware, or driver-binding issue.
Common 35-DS3ChipDUS3 Installation Errors and Fixes
This is the part users usually need most.
Installer won’t open
Common causes
- corrupted file
- blocked by Windows security
- incomplete extraction
- missing runtime dependency
- wrong installer type for your OS
Fixes
Try this in order:
- re-download the file
- right-click → Run as administrator
- right-click → Properties → check if there’s an Unblock option
- temporarily close non-essential background software
- extract the file again into a fresh folder
- try compatibility mode if it’s clearly an older package
If the installer still refuses to open, manual install may be the better path.
“Device not recognized”
This usually means one of two things:
- the install did not bind to the correct hardware
- the device itself is not communicating properly
Fixes
- reconnect the device
- try another USB/port/interface if relevant
- remove the unknown device in Device Manager, then scan again
- reinstall using the extracted folder manually
- restart after installation
- confirm the package is for the exact hardware revision
This is where people often install the wrong package because the model number looks “close enough.” Close enough is usually not enough.
“Driver is not compatible with this version of Windows”
This one is very common.
Why it happens
- wrong OS build
- 32-bit vs 64-bit mismatch
- package designed for older Windows releases
- vendor package not updated for newer systems
Fixes
- download the exact version for your OS
- check if the vendor has:
- Windows 10 version
- Windows 11 version
- legacy version
- use the latest stable release rather than the first file you find
If you are on a very new Windows build, it’s worth checking current compatibility guidance from Microsoft Support and the relevant hardware vendor release notes.
Unsigned or blocked driver
This is a major warning point.
If Windows says the driver is unsigned or blocked, do not bypass that casually unless:
- you fully trust the source
- you understand the risk
- the package is known to be legitimate but old
Safer approach
Before overriding anything:
- confirm the file came from the official source
- compare version and release notes
- see whether a newer signed version exists
Do not do this unless absolutely necessary
Avoid random internet advice telling you to:
- disable core security protections permanently
- force-install unknown unsigned drivers
- turn off Windows protections just to “make it work”
That is how a simple install becomes a system problem.
Installation completed but nothing works
This is one of the most misleading outcomes.
It usually means:
- the software installed, but the driver didn’t
- the driver installed, but the hardware binding failed
- firmware/software versions don’t match
- the device needs a reboot, reconnect, or initialization step
What to do
Try this exact order:
- Restart your PC
- Reconnect the hardware/software environment
- Open Device Manager and check status
- Remove the installed package
- Reinstall cleanly
- Test again
If it still fails, you may need:
- a different package version
- vendor-specific firmware
- hardware-level troubleshooting
Clean Install vs Upgrade Install
One of the smartest decisions you can make is choosing the right type of install.
| Install Type | Best For | Pros | Cons |
|---|---|---|---|
| Upgrade Install | Existing working setup with minor issue | Fast, simple, low effort | Can preserve bad settings/conflicts |
| Clean Install | Broken installs, failed detection, repeated errors | Best chance of stable result | Takes longer, needs cleanup |
| Manual Driver Install | Auto-installer fails | More control, useful for advanced fixes | Less beginner-friendly |
When to choose a clean install
Use a clean install if:
- you already tried installing it once and it failed
- the device appears incorrectly
- you see repeated install errors
- Windows keeps loading the wrong driver
- old files are likely conflicting
Clean install workflow
A proper clean install usually means:
- uninstall the current package
- restart
- remove stale device entry if needed
- install fresh version
- restart again
- validate
That is often far more effective than repeatedly layering installs over a broken setup.
Is 35-DS3ChipDUS3 Safe to Install?
It can be safe — but only if you verify it first.
This is the most honest answer.
The file itself is not automatically dangerous just because the name looks technical or obscure. But obscure package names are also exactly what bad download sites exploit.
Good signs
- comes from an official vendor/support environment
- file has a valid publisher or signature
- documentation references the package clearly
- version notes match your use case
Bad signs
- no explanation of what the file does
- hosted only on shady driver sites
- unrelated ads or fake update prompts around the download
- your antivirus/security tools flag it
- the package name does not match your hardware or support instructions
Real advice
If you cannot confidently answer:
“Why am I installing this, and what device/software does it belong to?”
…then you are not ready to install it yet.
That single rule will save many users from installing the wrong thing.
Best Practices After Installation
Once it’s installed, don’t just move on.
Do this after setup:
- restart once more if behavior seems inconsistent
- test the exact function the package was meant to fix
- note the installed version
- save a copy of the working installer
- document what changed
Why this matters
If a future update breaks it, you’ll want to know:
- which version worked
- when it worked
- what changed after installation
That makes future troubleshooting much easier.
When You Should Not Install 35-DS3ChipDUS3
Sometimes the smartest install is no install.
Do not install it if:
- you don’t know what it is
- the source is questionable
- your device is already working perfectly
- the package is for a different hardware revision
- the OS is unsupported
- the vendor has replaced it with a newer official package
This matters because not every “recommended file” is actually needed.
A lot of users break stable systems by installing things they never needed in the first place.
Rule to remember
Only install 35-ds3chipdus3 if it solves a real compatibility, recognition, or support need.
Not because the filename exists somewhere on the internet.
Reference Link : https://en.wikipedia.org/wiki/Computer_hardware
Final Verdict
If you want to install 35-ds3chipdus3 successfully, the winning approach is not speed — it’s verification and clean execution.
The safest workflow is:
- identify what the package is
- verify the source
- confirm compatibility
- create a rollback option
- install cleanly
- validate that it actually works
That is the difference between a smooth setup and a messy troubleshooting spiral.
If you skip those checks, you are not really installing — you are gambling.
Quick Dos and Don’ts
Do
- use the official source whenever possible
- match the package to your exact OS and hardware
- run as administrator
- restart after installation
- use manual install if auto setup fails
- create a restore point first
Don’t
- install unknown packages from random driver sites
- assume similar model names are compatible
- keep rerunning a broken installer without cleaning up
- disable security protections casually
- install it if you don’t know what problem it solves
Suggested E-E-A-T Trust Block
Add a short trust section like this near the end of the article:
Why trust this guide?
This guide is written using practical driver-install troubleshooting logic, clean installation workflows, source-verification best practices, and real-world Windows setup behavior to help reduce failed installs and unsafe file usage.
FAQs: How to Install 35-DS3ChipDUS3
1) What is 35-ds3chipdus3 used for?
It is most likely a driver, chipset, firmware, or support package tied to a specific device or system component. Before installing it, you should confirm exactly what hardware or software it belongs to.
2) Is 35-ds3chipdus3 safe to install?
It can be safe if it comes from a trusted official source and matches your system. It is not safe to assume every file with that name online is legitimate.
3) Why is 35-ds3chipdus3 not installing on my PC?
The most common reasons are:
- wrong OS version
- missing admin permissions
- corrupted installer
- incompatible hardware
- conflict with an older installed version
A clean reinstall usually works better than repeatedly rerunning the same file.
4) Can I install 35-ds3chipdus3 manually?
Yes. If the installer fails, you can often install it manually through Device Manager, especially if the package includes INF driver files. This is often the best fix when auto-install tools are broken.
5) Do I need to uninstall the old version first?
Usually, yes — if the old version is broken, conflicting, or causing recognition issues. If the current install is stable and you’re only updating minor support files, an upgrade install may work